Last updated: April 09, 2024
Download DQOps using PIP
This guide shows how to quickly download DQOps from PyPi, and start a local development instance to analyze data quality or use the DQOps Client.
Overview
DQOps is available as a Python package dqops. This package contains a bootstrapper that will download a full DQOps distribution from DQO GitHub and install a Java JRE 17 in a version specific to the current platform. DQOps runs on Windows, Linux and MacOS. Both x64 and arm8 platforms are supported.
Running DQOps as a server
DQOps python package is a quick option to run a local, non-production instance. Please choose a Docker distribution to run DQOps as a long-running production instance that can monitor the data quality at all times.
Prerequisites
To use DQOps you need:
-
Python version 3.8 or greater (for details see Python's documentation and download sites).
To confirm that you have Python installed run the following command
To view the Python 3 version, run
python3 --versioninstead. -
Ability to install Python packages with pip.
To confirm that you have pip installed run the following command
Current version of pip should be displayed.
Installation
DQOps is available on PyPi repository.
-
Create an empty folder where you want to create your
DQOps User Home.DQOps User Homeis a folder where DQOps will store the metadata of imported data sources, the configuration of activated data quality checks, and the data quality results.Starting DQOps in an empty folder is required
Please do not go directly to the next step. First, create an empty folder, then change the current folder to this new new directory that we are calling
DQOps User Home. During the first run, DQOps will create the folder structure described in the DQOps user home folder concept, creating DQOps files in an empty folder is advised. -
Open a terminal, change the current folder to the created directory, and install DQOps via pip manager
-
Verify if the installation was successful.
You should see a message that confirms a successful installation of the
dqopspackage.If you see additional two warning (shown in yellow on Microsoft Windows) that the default location where scripts are added is not included in the
PATHenvironment variable, copy the path shown in the window (it was C:\Users\<yourlogin>\AppData\Roaming\Python\Python39\Scripts it the example below), and add it to the default$PATHenvironment variable. After changing the environment variables, you will need to open a new Command Prompt window that uses the new configuration.WARNING: The script dqo.exe is installed in 'C:\Users\<yourlogin>\AppData\Roaming\Python\Python39\Scripts' which is not on PATH. Consider adding this directory to PATH or, if you prefer to suppress this warning, use --no-warn-script-location. Successfully installed dqops-1.1.0After adding the Python's Scrips folder to the path, you will be able to run DQOps simply by typing
dqofrom the command line.
Solving certificate issues
You may receive an issue that the dqops package was not found, as shown below.
ERROR: Could not find a version that satisfies the requirement dqops (from version: none)
ERROR: No matching distribution found for dqops
The problem is related to an outdated configuration of root certificates that are bundled with Python. Use the following command to add the host names of download locations to the list of trusted hosts.
After adding the PyPi host names to the list of trusted locations, repeat the installation from the 2. step.
Start DQOps application
-
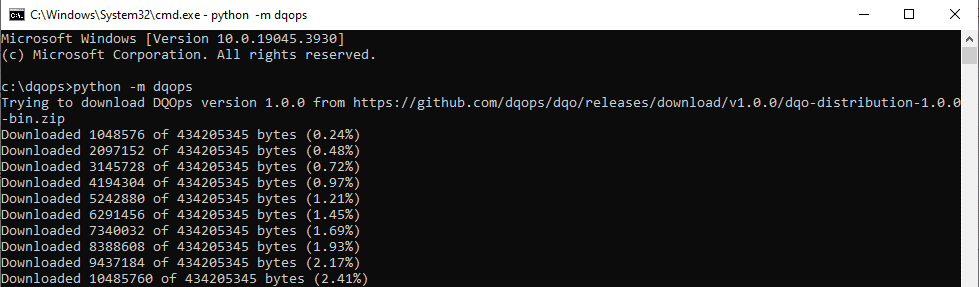
Run DQOps to finalize the installation. This process may take some time as the DQOps package must download a full DQOps distribution (~400 MB zip file) and install Java JRE 17 during the first start.
DQOps will download the full DQOps release package from GitHub, or some alternative mirrors.
When the download of the DQOps distribution starts (a ~400MB zip file), you should see the progress.
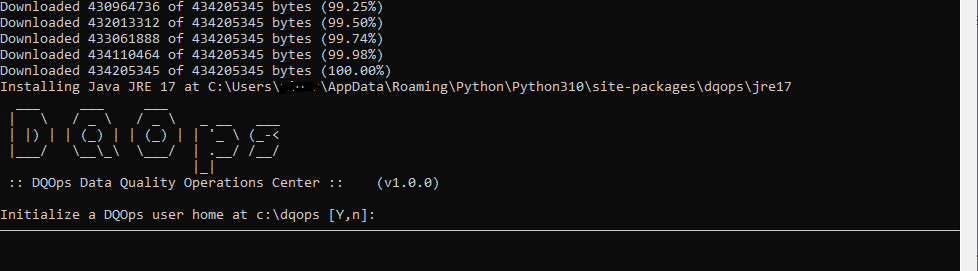
After the distribution is downloaded and unzipped, DQOps will also download and install Java JRE 17. Once it is done, you should see the following screen.
In case that download stops due to network issues, DQOps will retry the download, or use an alternative mirror.
Start DQOps using a startup script
DQOps package registers also a
dqoscript on the PATH. You can start DQOps simply by running adqocommand, if the Python location is correctly configured on the PATH environment variable.If you are lucky to have a proper Python installation, you can start DQOps simply from the command line as shown below.
-
Initialize DQOps
DQOps User Homefolder.After installation, you will be asked whether to initialize the DQOps
DQOps User Homefolder in the default location. Type Y to initialize the folder content.
TheDQOps User Homefolder locally stores data such as sensor readouts and checkout results, as well as data source configurations. Read the DQOps user home folder concept to learn more.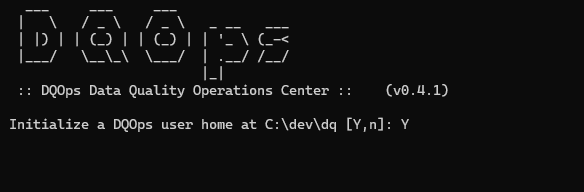
-
Login to DQOps Cloud.
To use all DQOps features, such as storing data quality definitions and results in the cloud and the data quality dashboards, you must create a DQOps Cloud account.
Once the
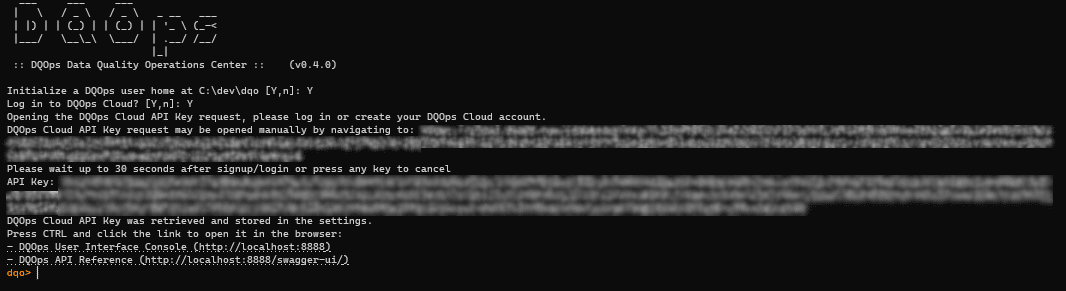
DQOps user homefolder is initialized, DQOps will ask you to log in to your DQOps Cloud account.
After typing Y, you will be redirected to https://cloud.dqops.com/registration, where you can create a new account, use Google single sign-on (SSO) or log in if you already have an account.
During the first registration, your DQOps Cloud pairing API key will be generated and automatically retrieved by DQOPS application. The API Key is now stored in the configuration file. You can close the browser window that shows your https://cloud.dqops.com/ account. Since now on, your local DQOps instance is fully functional and can work mostly offline.
-
Open the DQOps User Interface Console in your browser by CTRL-clicking on the link displayed on the command line (for example http://localhost:8888) or by copying the link. You will see the welcome screen as shown below.

What's next
- Read the installation manual of starting DQOps as a docker container, which is a preferred way to run DQOps in production mode, allowing other users and stakeholders to access the platform.